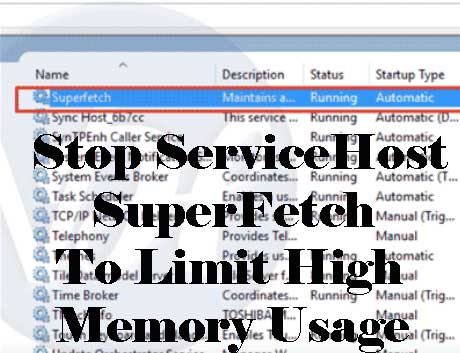
High memory usage is headache for everyone which can be fix by permanently stopping ServiceHost SuperFetch (Sysmain) service on windows. Here we share 3 methods for stop servicehost superfetch service and will not restart the service again after restart windows.
Using latest Windows 11 or 10 OS and Your System is Taking Too Much Cpu , Disk Usage then You are not alone this World. Some Takes Action and Some are Unable to Find any Solutions. If you’re on this page, Then you are taking action to fix high memory issue and we will do best from our side.
Facing this Same Problem (High ram taking superfetch service) then you are Come on the Right Place Because Today Here we Will Discuss some Ways to Solve SuperFetch High Memory Usage in this article.
Recently switched to windows 11 then you need to configure lots of things which are not easy to done because lots of options has been changed from previous version. Some of the guides, You will meet on our website like Partition of c drive , Mirror android screen on windows 11 , Free registry cleaner or still using old windows version then download windows 11 checker to know your device supporting or not.
Let’s come to the disable servicehost superfetch file but before proceed further, Know about what the service actually do on windows operating system.
What is Sysmain ServiceHost SuperFetch on windows ?
It is a Windows System File which Runs Automatic on System Start up. It automatic fetches upcoming pages when your mouse hover which optimize performance and speed.
Some time it Drains too Much CPU Resources by Some Must Load Programs Which Causes our PC Performance Low. It also effects on battery usage because running on high memory and CPU drains battery too fast. If you will Stop ServiceHost SuperFetch Then You Can Optimize Your Speed Back and fix high memory usage on windows.
How to Check Sysmain SuperFetch service is Taking high memory ?
When you are Facing High Memory Usage then Open Your Task Manager and Navigate to Process Tab , Now Check all the Process Name One by One which taking high resources. If you sees Sysmain on windows 11 and Superfetch on windows 10 then Follow Our below Solutions to permanent Stop it and bring High Usage Memory in Limit.
How to disable sysmain service on windows 11 ?
On windows 11 servicehost superfetch renamed to sysmain service which prefetch pages before opening for speed optimization. It takes high ram because its works is also high. Windows users can easily disable and enable it. It doesn’t interrupt other programs. Disabling sysmain on windows 11 is completely safe.
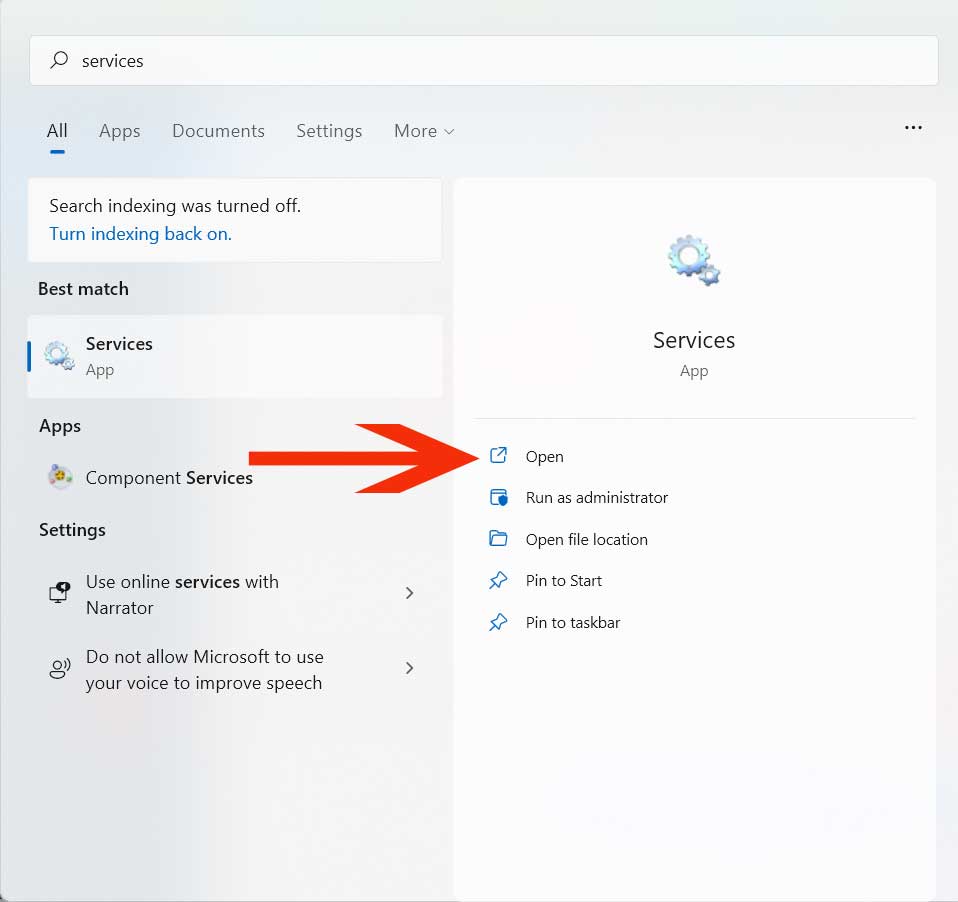
1. Click on “Start” button or press windows icon.
2. Enter “Services” and click to open services app or Press windows + r to open run box and enter “Services.msc” >> Enter.
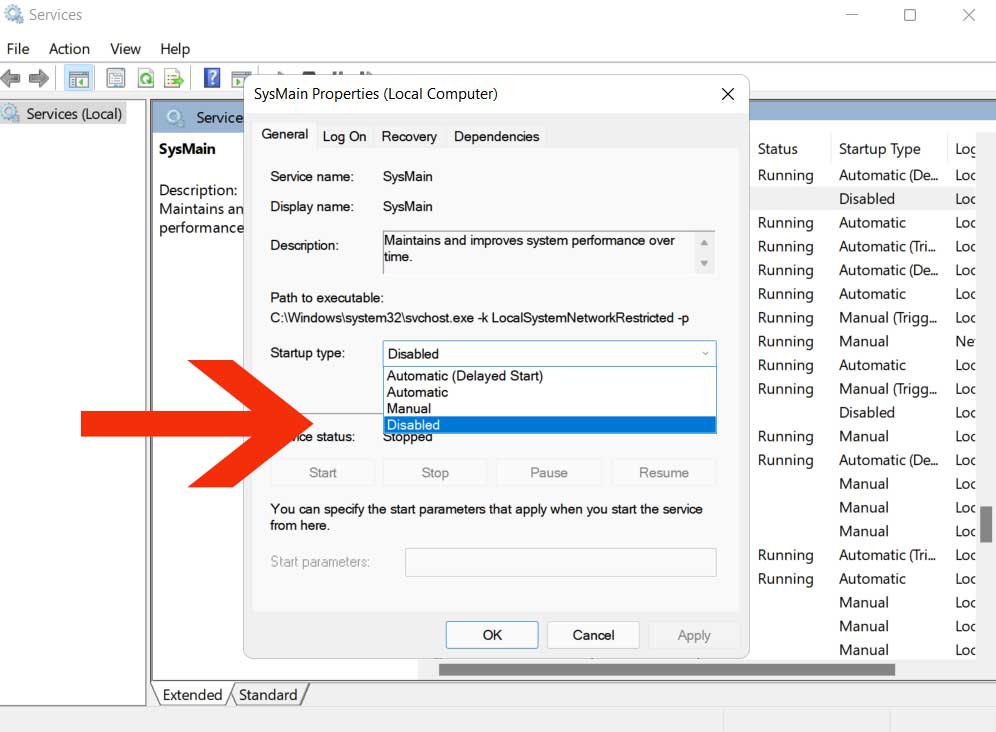
3. Find service named “Sysmain” and double click on it.
4. From service status >> Click on “stop” button and stop it.
5. Navigate to “Startup type” section and select “Disable” from list. You can also set manual, When windows require the service will start and stop on shutdown.
6. Click on “Apply” and close it. Now check if facing high memory issue. It will be solved.
How to Stop ServiceHost SuperFetch on windows 10 & 8 ?
The Problem of this File Is come After Windows 8 and later Versions, By Below Methods you Can Disable it
Solution -1 Stop SuperFetch File Via Run Command
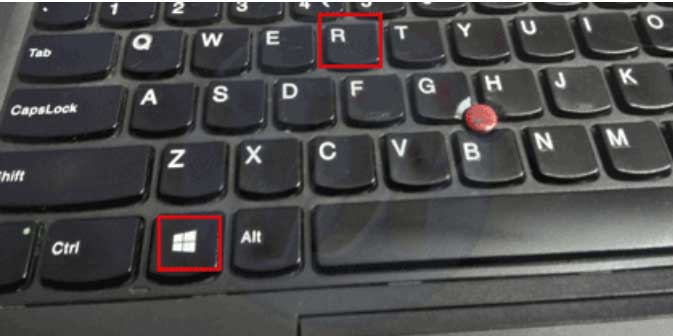
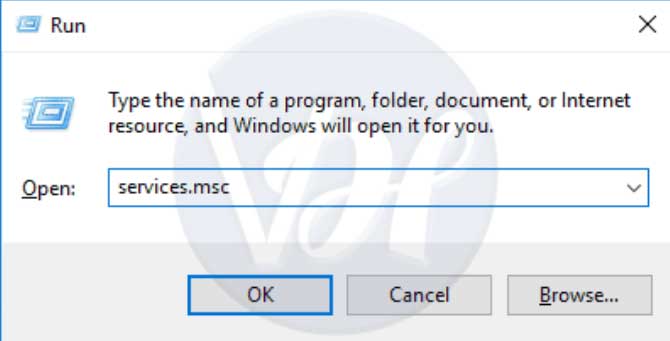
- At Homepage, Press Windows Button + R (Shortcut Key) to Open Run Command or You can Search this Program
- Now Enter this Command “services.msc” & hit Enter
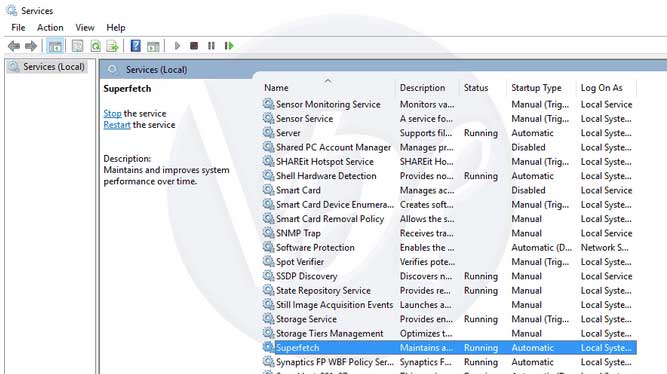
- You Will see Lots of Programs , Now Simply Press “S” Key to Quick find or Manually Search
- Click on it to Edit SuperFetch File
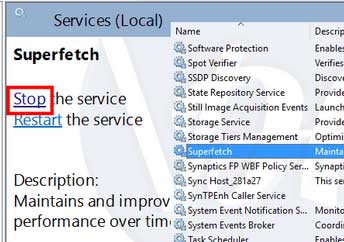
- In left corner , You Will See Option To Stop it
- Click on it to Stop ServiceHost SuperFetch Program
- Sometimes It Can hangs your Pc for Few Seconds
Solution -2 Stop SuperFetch File Via Command Prompt (CMD)
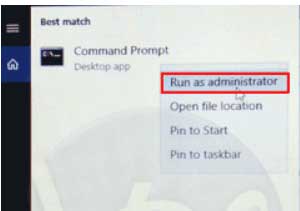
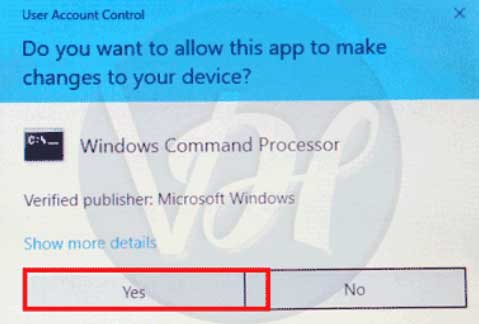
- Search CMD and Run it Via Administrator privileges
- Select YES if windows ask for Permission
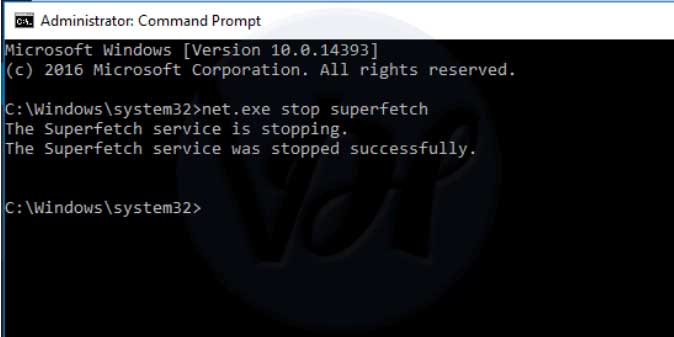
- Once it Open , enter this CMD Command to Stop SuperFetch “net.exe stop superfetch“
- It Takes Few Seconds
- Once it Successfully Stopped you will get Message on CMD Screen
Now your High Memory Usage problem Will be Solved but Still You are Getting Problems then Shift on Next Method
How to Fix High memory Usage via Windows Update
Windows Cares About Their User Experience and Time to Time Releases New Updates, Sometime We need to Update our Windows to Solve High memory Usage. Below is the Steps to Fix High Memory Usage via Windows TroubleShooter Program
- Firstly Press Windows + I Key at the Same time to Open Windows Settings
- Select Update and Security Option
- Select Troubleshooter Program and then Select Windows Update
- Now Hit On Run Button to Scan Your Full Computer to Check all Problems
- Once it Scan , You will See your Issues
- Click on Fix via Window Update and Next Button to complete this Process
Final words
So guys I Hope you Successfully Stopped ServiceHost SuperFetch Process to Bring your High Memory Usage Memory in Limit. This is the All Possible Solutions to Solve the high Ram , CPU and Disk Usage to Speed up of your Pc.
If you Loved this Post then please share it With your Friends Circle and Still Any Doubt is Rotating in your Mind So Shift Below in Comments Section to get Answers

